sitemap配置
安装sitemap插件1
2npm install hexo-generator-sitemap --save
npm install hexo-generator-baidu-sitemap --save
修改next主题下的_config.yml1
2
3
4
5
6menu:
sitemap: /sitemap.xml || sitemap
seo: true
baidu_push: true
修改hexo的_config.yml的url为博客地址,这里是1
url: https://jecyhw.github.io
博客链接URL唯一(可选)
hexo-abbrlink插件安装1
npm install hexo-abbrlink --save
修改hexo的_config.yml1
2
3
4
5#permalink: :year/:month/:day/:title/
permalink: :abbrlink/
abbrlink:
alg: crc32 # 算法:crc16(default) and crc32
rep: dec # 进制:dec(default) and hex
添加robots.txt
在source目录下创建robots.txt,复制下面内容,修改Sitemap地址为博客地址1
2
3
4
5
6
7
8
9
10
11
12
13
14User-agent: *
Allow: /
Allow: /categories/
Allow: /tags/
Allow: /archives/
Disallow: /vendors/
Disallow: /js/
Disallow: /css/
Disallow: /fonts/
Disallow: /vendors/
Disallow: /fancybox/
Sitemap: https://jecyhw.github.io/sitemap.xml
Sitemap: https://jecyhw.github.io/baidusitemap.xml
部署提交到github1
hexo g -d
链接提交到百度站点
进入百度站长工具
填写博客地址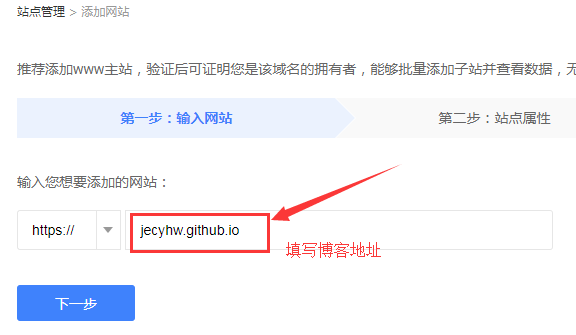
设置站点领域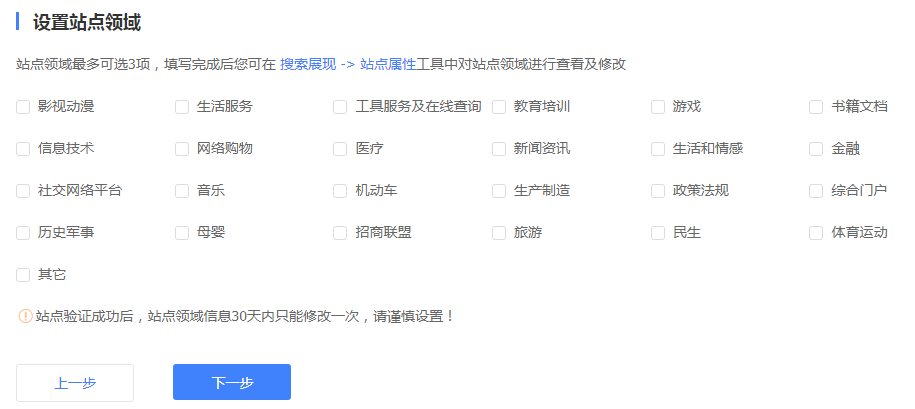
验证网站,这里选择文件验证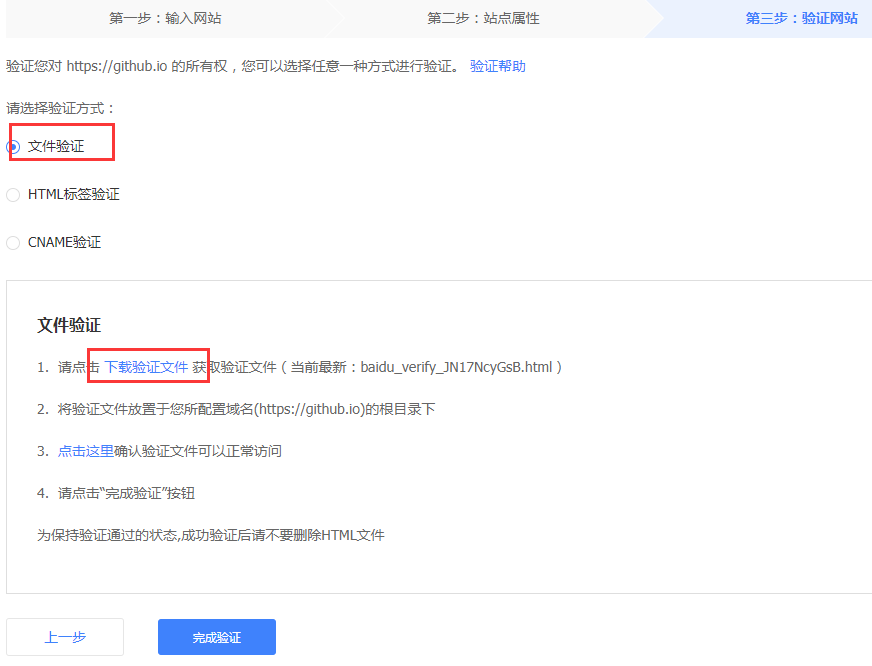
下载验证文件,放入到source目录下,打开验证文件,在最上面加入1
2
3
4
---
layout: false
---
部署到github上1
hexo g -d
完成验证。百度收录比较慢,需要等待好长一段时间才能搜索到。
链接提交到谷歌
进入google站点平台
添加站点
验证网站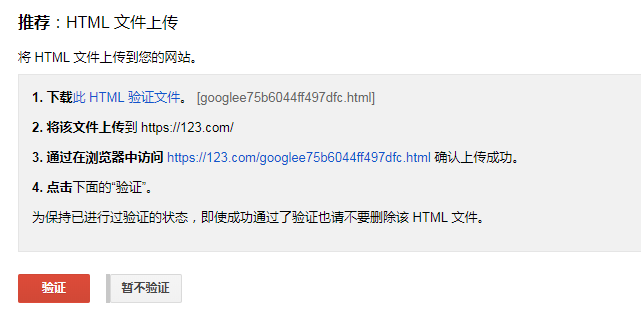
下载验证文件,放入到source目录下,打开验证文件,在最上面加入1
2
3
4
---
layout: false
---
部署到github上1
hexo g -d
完成验证。
添加站点地图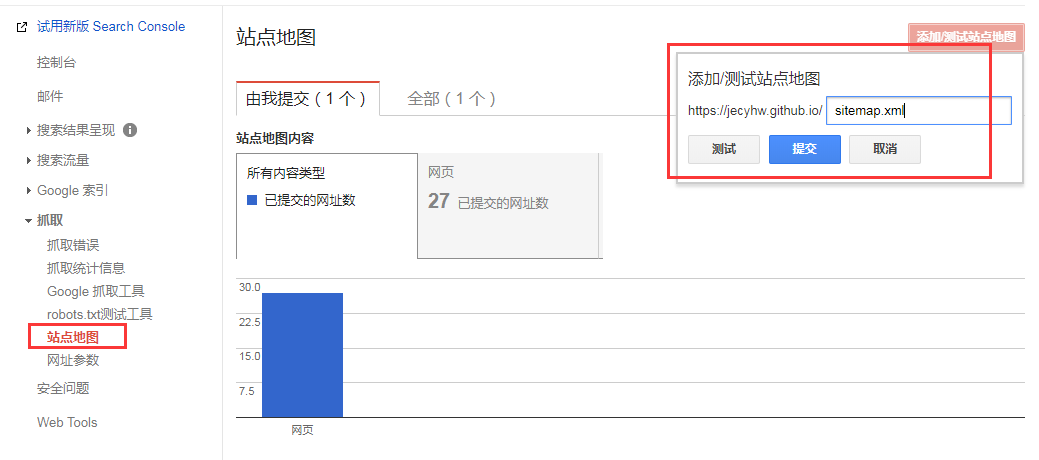
等几个小时就能在google上搜索到自己的博客了
添加nofollow标签(可选)
修改themes/next/layout/_partials/footer.swig,对所有标签加上 rel="external nofollow"
1
2
3<a class="theme-link" target="_blank" href="https://hexo.io" rel="external nofollow">
<a class="theme-link" target="_blank" href="https://github.com/iissnan/hexo-theme-next" rel="external nofollow">
修改themes/next/layout/_macro/sidebar.swig,对部分标签加上 rel="external nofollow" ,如下所示
1
2
3
<a href="https://creativecommons.org/{% if theme.creative_commons === 'zero' %}publicdomain/zero/1.0{% else %}licenses/{{ theme.creative_commons }}/4.0{% endif %}/" class="cc-opacity" target="_blank" rel="external nofollow">
<a href="{{ link }}" title="{{ name }}" target="_blank" rel="external nofollow">{{ name }}</a>